Contents
Tutorials
- Python Tutorial
- NumPy Tutorial
- Matplotlib Tutorial
- PyQt5 Tutorial
- BeautifulSoup Tutorial
- xlrd/xlwt Tutorial
- Pillow Tutorial
- Googletrans Tutorial
- PyWin32 Tutorial
- PyAutoGUI Tutorial
- Pyperclip Tutorial
- TensorFlow Tutorial
- Tips and Examples
Pillow 기본 사용
이미지 열기 - open()
from PIL import Image

im = Image.open('./img/rush_hour.png')

print(im.filename)
print(im.size)
print(im.width, im.height)
print(im.format)
open()을 이용해서 이미지를 열어줍니다.
filename은 파일의 이름, size는 (가로 크기, 세로 크기) 튜플, width는 가로 크기, height는 세로 크기, format은 이미지의 확장자입니다.
결과는 아래와 같습니다.
./img/rush_hour.png
(316, 563)
316 563
PNG
이미지 잘라서 저장하기 - crop(), save()
from PIL import Image

im = Image.open('./img/rush_hour.png')

im2 = im.crop((0, 200, 316, 510))
im2.save('./img/rush_hour_crop.png')
이미지의 특정 영역을 잘라 내기 위해서는 crop()을 사용합니다. 사각형의 형태로 잘라 내는데 (왼쪽 위 x, 왼쪽 위 y, 오른쪽 아래 x, 오른쪽 아래 y) 좌표를 튜플의 형태로 입력해 줍니다.
잘라 낸 이미지를 파일로 저장하려면 save()를 사용합니다. 저장될 파일의 경로와 이름(‘./img/rush_hour_crop.png’)을 넣어줍니다.
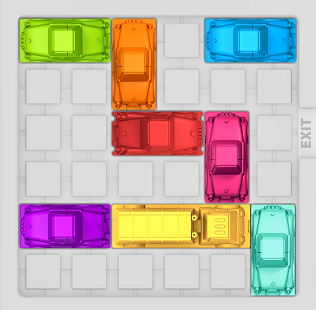
아래와 같은 이미지 파일이 저장됩니다.

rush_hour_crop.png
이미지 회전하기 - rotate()
from PIL import Image

im = Image.open('./img/rush_hour.png')

im2 = im.crop((0, 200, 316, 510))
im2.save('./img/rush_hour_crop.png')

im3 = im2.rotate(90)
im3.save('./img/rush_hour_rotate_90.png')

im4 = im2.rotate(45)
im4.save('./img/rush_hour_rotate_45.png')
이미지를 회전하려면 rotate()를 사용합니다. 잘라 낸 이미지(im2)를 회전해 보겠습니다.
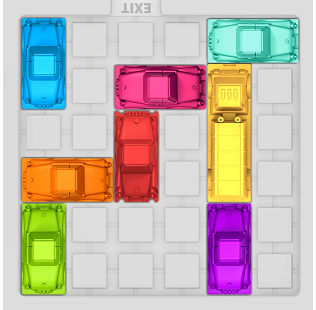
rotate()에는 회전할 각도를 입력하는데, 90도를 회전하면 아래와 같은 이미지가 됩니다.

rush_hour_rotate_90.png
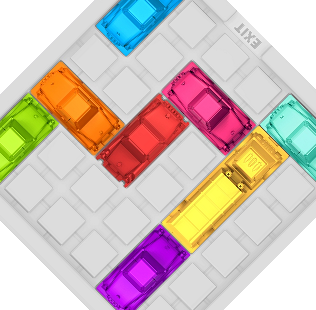
45도를 회전하면 아래와 같은 이미지가 됩니다.

rush_hour_rotate_45.png
이전글/다음글
이전글 : Pillow - 파이썬을 이용한 이미지 처리
다음글 : Pillow 픽셀 접근하기