Contents
- TensorFlow - 구글 머신러닝 플랫폼
- 1. 텐서 기초 살펴보기
- 2. 간단한 신경망 만들기
- 3. 손실 함수 살펴보기
- 4. 옵티마이저 사용하기
- 5. AND 로직 연산 학습하기
- 6. 뉴런층의 속성 확인하기
- 7. 뉴런층의 출력 확인하기
- 8. MNIST 손글씨 이미지 분류하기
- 9. Fashion MNIST 이미지 분류하기
- 10. 합성곱 신경망 사용하기
- 11. 말과 사람 이미지 분류하기
- 12. 고양이와 개 이미지 분류하기
- 13. 이미지 어그멘테이션의 효과
- 14. 전이 학습 활용하기
- 15. 다중 클래스 분류 문제
- 16. 시냅스 가중치 얻기
- 17. 시냅스 가중치 적용하기
- 18. 모델 시각화하기
- 19. 훈련 과정 시각화하기
- 20. 모델 저장하고 복원하기
- 21. 시계열 데이터 예측하기
- 22. 자연어 처리하기 1
- 23. 자연어 처리하기 2
- 24. 자연어 처리하기 3
- 25. Reference
- tf.cast
- tf.constant
- tf.keras.activations.exponential
- tf.keras.activations.linear
- tf.keras.activations.relu
- tf.keras.activations.sigmoid
- tf.keras.activations.softmax
- tf.keras.activations.tanh
- tf.keras.datasets
- tf.keras.layers.Conv2D
- tf.keras.layers.Dense
- tf.keras.layers.Flatten
- tf.keras.layers.GlobalAveragePooling2D
- tf.keras.layers.InputLayer
- tf.keras.layers.ZeroPadding2D
- tf.keras.metrics.Accuracy
- tf.keras.metrics.BinaryAccuracy
- tf.keras.Sequential
- tf.linspace
- tf.ones
- tf.random.normal
- tf.range
- tf.rank
- tf.TensorShape
- tf.zeros
Tutorials
- Python Tutorial
- NumPy Tutorial
- Matplotlib Tutorial
- PyQt5 Tutorial
- BeautifulSoup Tutorial
- xlrd/xlwt Tutorial
- Pillow Tutorial
- Googletrans Tutorial
- PyWin32 Tutorial
- PyAutoGUI Tutorial
- Pyperclip Tutorial
- TensorFlow Tutorial
- Tips and Examples
23. 자연어 처리하기 2
이제 자연어 처리 데이터셋 News headlines dataset for sarcasm detection을 이용해서 앞에서 다루었던 텍스트 토큰화를 진행해 보겠습니다.
이 페이지에서는 Google Colab (Colaboratory)을 사용해서 웹브라우저 상에서 특별한 환경 구성없이 머신러닝 코드를 작성합니다.
Google Colab에 대해서는 Google Colab 소개 페이지를 참고하세요.
순서는 아래와 같습니다.
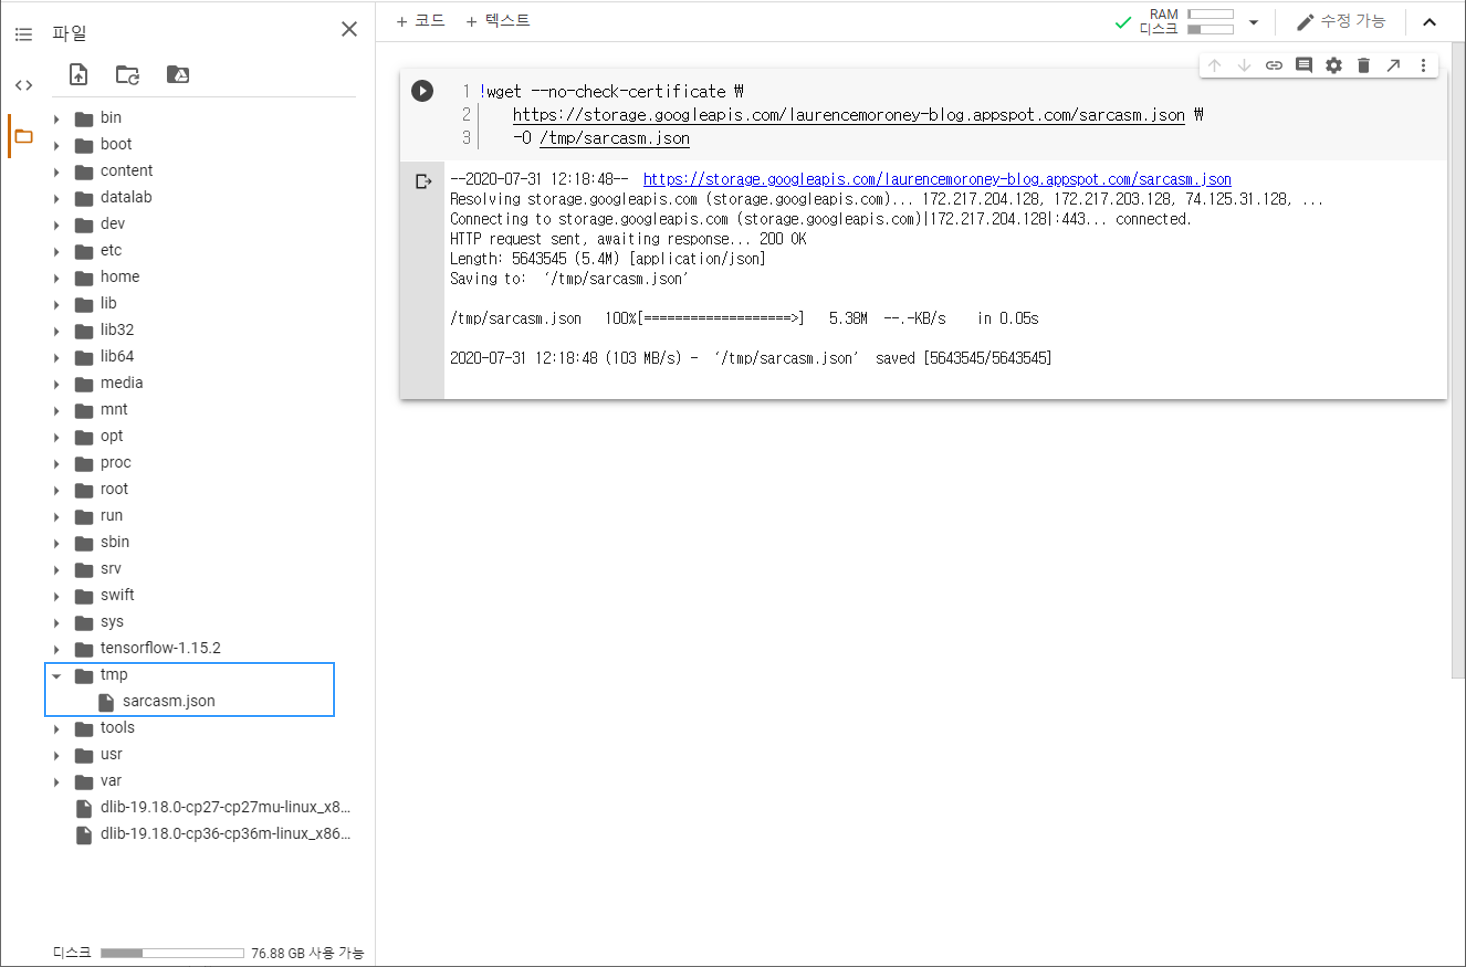
데이터셋 다운로드하기
!wget --no-check-certificate \
  https://storage.googleapis.com/laurencemoroney-blog.appspot.com/sarcasm.json \
  -O /tmp/sarcasm.json
우선 Colab 코드셀에 위의 명령어를 입력해서 데이터셋을 다운로드합니다.
아래 그림과 같이 페이지 왼쪽의 목차 탭을 열어서 tmp 폴더에
sarcasm.json 파일이 다운로드되어 있는지 확인합니다.
데이터셋 준비하기
import json

with open("/tmp/sarcasm.json", 'r') as f:
  datastore = json.load(f)

sentences = []
labels = []
urls = []
for item in datastore:
  sentences.append(item['headline'])
  labels.append(item['is_sarcastic'])
  urls.append(item['article_link'])

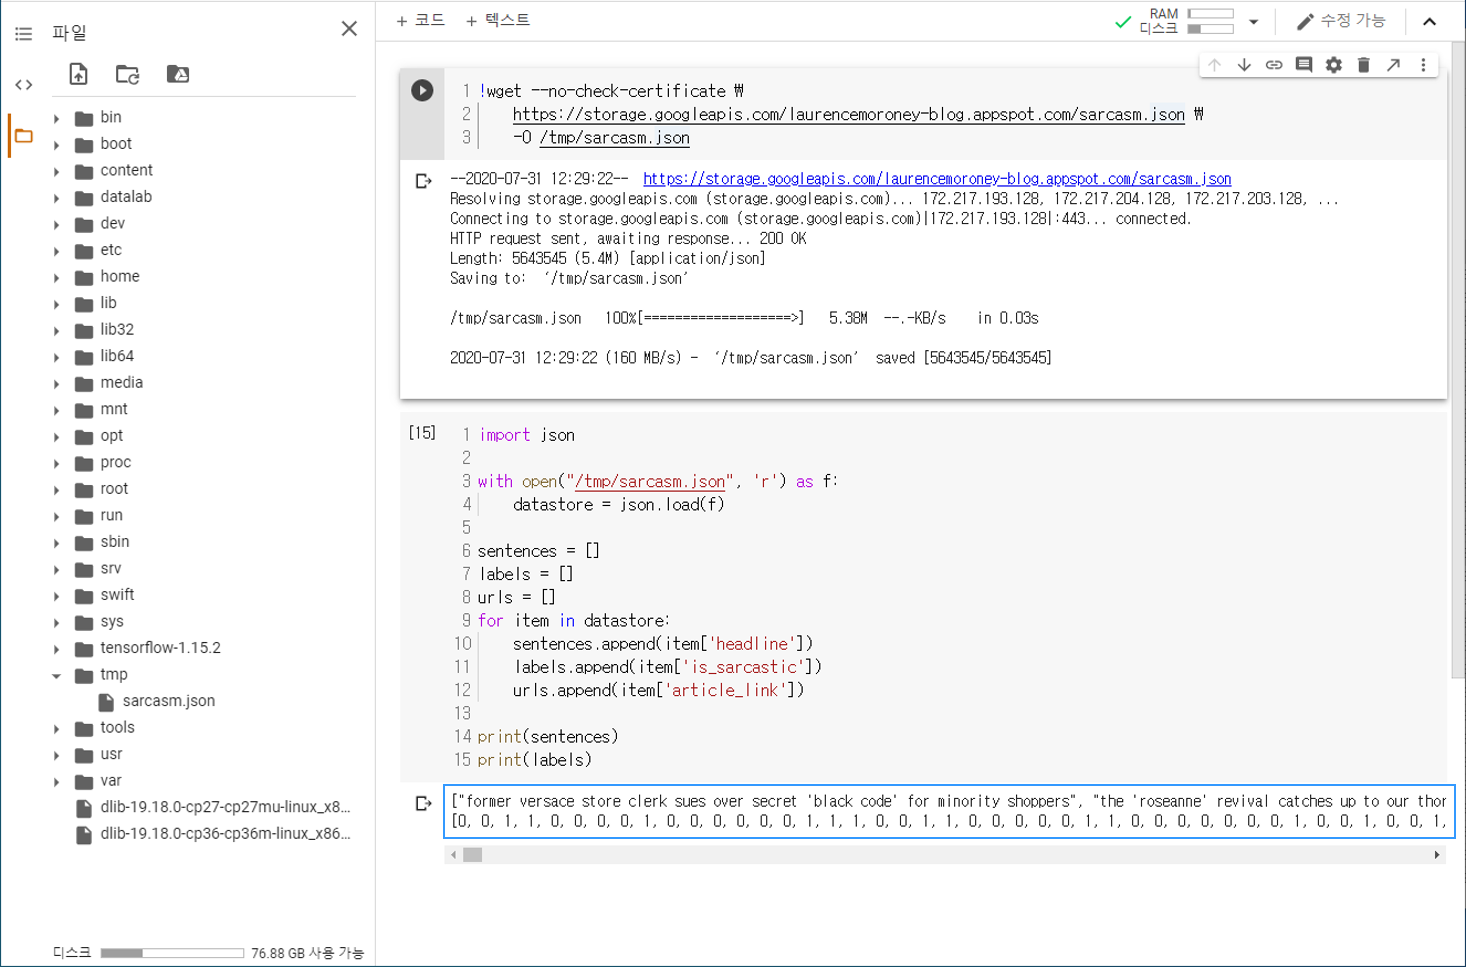
print(sentences)
print(labels)
["former versace store clerk sues over secret 'black code' for minority shoppers", "the 'roseanne' revival catches up ...
[0, 0, 1, 1, 0, 0, 0, 0, 1, 0, 0, 0, 0, 0, 0, 1, 1, 1, 0, 0, 1, 1, 0, 0, 0, 0, 0, 1, 1, 0, 0, 0, 0, 0, 0, 0, 1, 0, 0, ...
json 형식의 데이터를 불러오기 위해 파이썬 기본 내장 패키지인 json 모듈을 사용합니다.
News headlines dataset for sarcasm detection 데이터셋은 아래와 같은 세 가지 속성에 대한 데이터를 리스트 형태로 제공합니다.
headline : 뉴스 기사의 헤드라인.
is_sarcastic : 뉴스 헤드라인이 Sarcastic하다면 1, 그렇지 않다면 0.
article_link : 뉴스 기사 원문 링크.
각각의 데이터를 sentences, labels, urls 리스트에 담아줍니다.
sentences와 labels를 출력하면 아래와 같습니다.
데이터 토큰화하기
from tensorflow.keras.preprocessing.text import Tokenizer
from tensorflow.keras.preprocessing.sequence import pad_sequences

tokenizer = Tokenizer(oov_token="<OOV>")
tokenizer.fit_on_texts(sentences)

word_index = tokenizer.word_index
print(len(word_index))
print(word_index)

sequences = tokenizer.texts_to_sequences(sentences)
padded = pad_sequences(sequences, padding='post')
print(padded[0])
print(padded.shape)
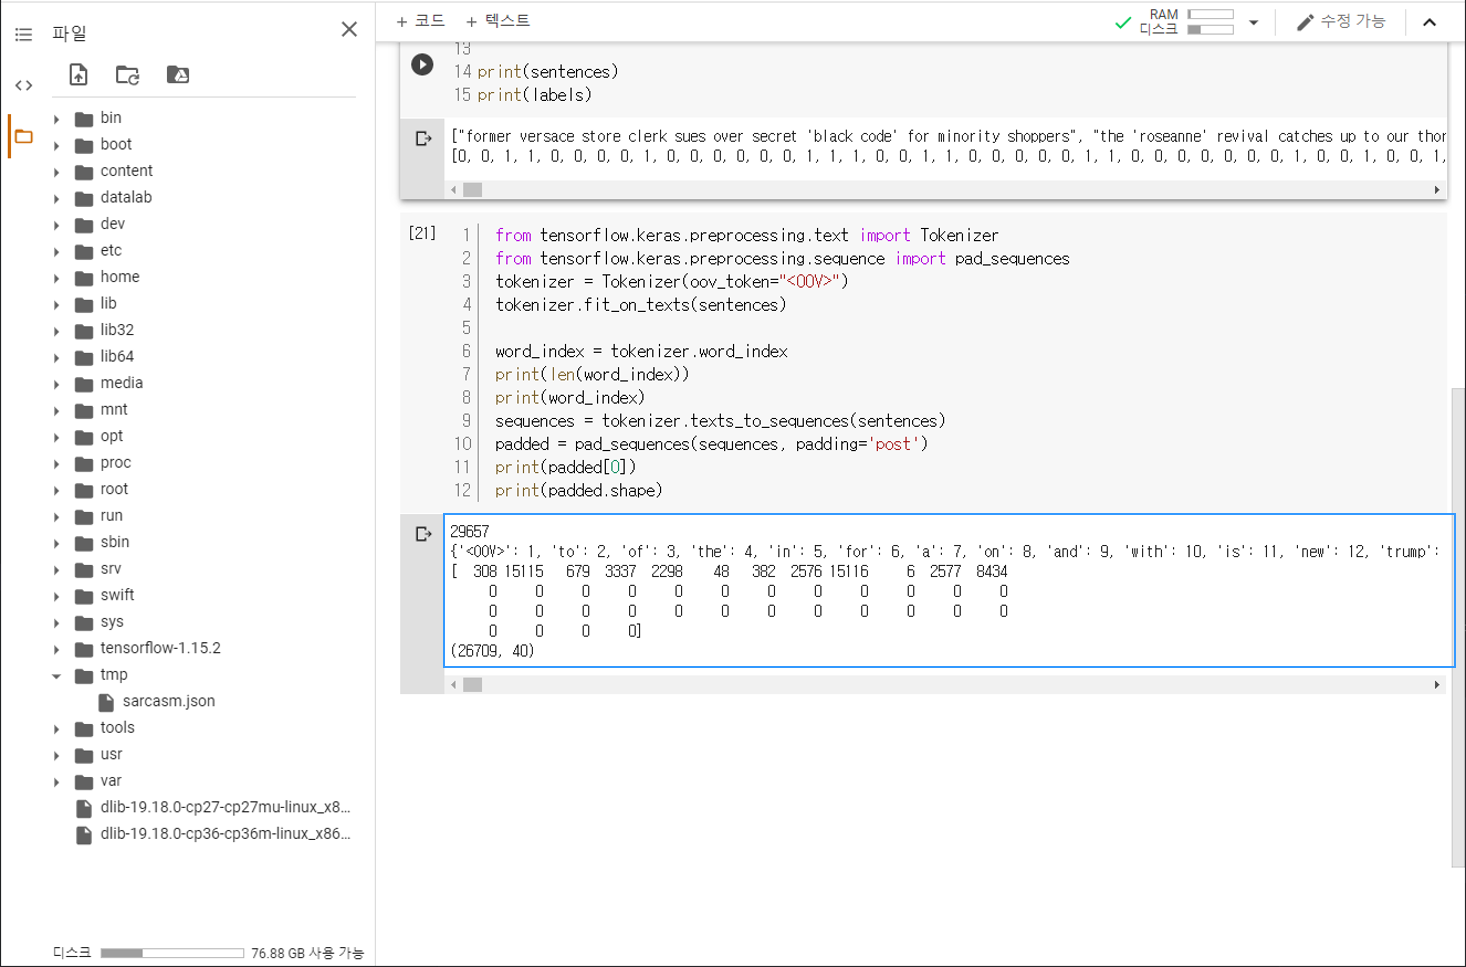
29657
{'<OOV>': 1, 'to': 2, 'of': 3, 'the': 4, 'in': 5, 'for': 6, 'a': 7, 'on': 8, 'and': 9, 'with': 10, 'is': 11, 'new': 12, ...
[  308 15115   679  3337  2298    48   382  2576 15116     6  2577  8434
     0     0     0     0     0     0     0     0     0     0     0     0
     0     0     0     0     0     0     0     0     0     0     0     0
     0     0     0     0]
(26709, 40)
앞 페이지에서 다뤘던 Tokenizer를 이용해서 헤드라인 문장 (sentences)을 토큰화합니다.
word_index를 출력해보면, 총 29657개의 단어가 토큰화되었음을 알 수 있습니다.
texts_to_sequences를 이용해서 문장을 숫자의 시퀀스로 변환하고,
pad_sequences를 이용해서 시퀀스에 패딩을 설정합니다.
첫번째 시퀀스 (padded[0])를 출력해보면, 12개의 단어로 이루어진 문장이 길이 40의 시퀀스로 변환되었음을 알 수 있습니다.


